15-Minute Oyakodon (Japanese Chicken & Egg Rice Bowl)
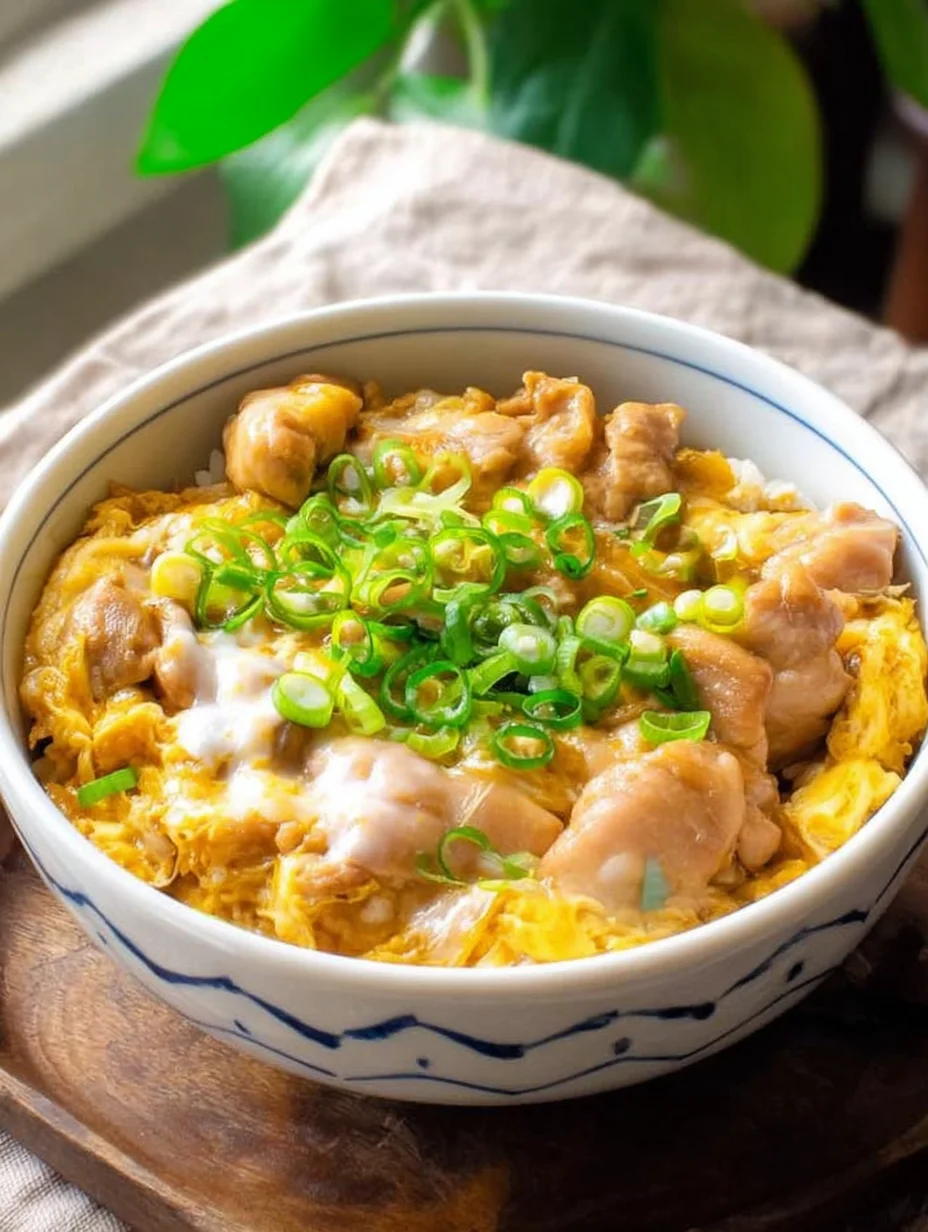
Have you ever craved a dish that’s equal parts comforting and exotic, something that wraps you in warmth like a hug from an old friend? That’s exactly how I feel about Oyakodon every time I make it. This classic Japanese rice bowl, with its tender chicken, silky eggs, and savory-sweet broth, has become a staple in my kitchen for busy weeknights. I remember the first time I tried Oyakodon at a tiny Tokyo spot—it was love at first bite, and now I’m thrilled to share my homemade version with you. It’s simpler than you might think, and the results? Pure comfort food magic.
In my experience, Oyakodon isn’t just a meal; it’s a quick escape to Japan without leaving your stove. With ingredients you likely have on hand, you can whip up this Oyakodon in under 30 minutes, making it perfect for when life’s rushing by. Let’s dive into the recipe and get you savoring every flavorful bite.
Key Takeaways:
- Oyakodon is a quick Japanese rice bowl featuring chicken, egg, and onions in a savory broth.
- Prep and cook time totals around 25 minutes, ideal for weeknight dinners.
- The balance of sweet and umami flavors makes Oyakodon irresistibly delicious.
- Use fresh eggs and high-quality dashi for the best Oyakodon results.
- Store leftovers in the fridge for up to 2 days and reheat gently to maintain texture.
Why You’ll Adore This Oyakodon
Comfort in a Bowl: There’s something so soothing about the way the eggs envelop the chicken in Oyakodon—it’s like a cozy blanket on a rainy day. I always feel instantly relaxed when I sit down to a steaming bowl. You won’t believe how this simple dish can transform your evening.
Grab This Chef Knife Now - Almost Gone!
- Stays Razor-Sharp: Ice-hardened blade keeps its edge longer than ordinary knives
- Superior Grip Control: Unique finger hole design gives you perfect balance and safety
- Built to Last a Lifetime: Premium stainless steel blade with elegant beech wood handle
- ✓ Finally, a knife that stays sharp and feels comfortable in my hand
- ✓ Professional quality without the premium price tag
- ✓ Makes meal prep faster and more enjoyable
⏰ Only a few items left in stock - order soon
Lightning-Fast Prep: Who has time for hours in the kitchen? This Oyakodon comes together in minutes, yet tastes like you’ve slaved over it all day. It’s my go-to when I’m short on time but craving something homemade and hearty.
Flavor Explosion: The sweet mirin and savory soy sauce in Oyakodon create layers of taste that dance on your palate. Every bite is a perfect harmony of textures—from the fluffy rice to the tender proteins. It’s addictively good, I promise.
Family Favorite: Kids and adults alike rave about this Oyakodon in my house. It’s versatile enough to tweak, but the classic version always wins hearts. Serve it up and watch the smiles appear—it’s that reliable.
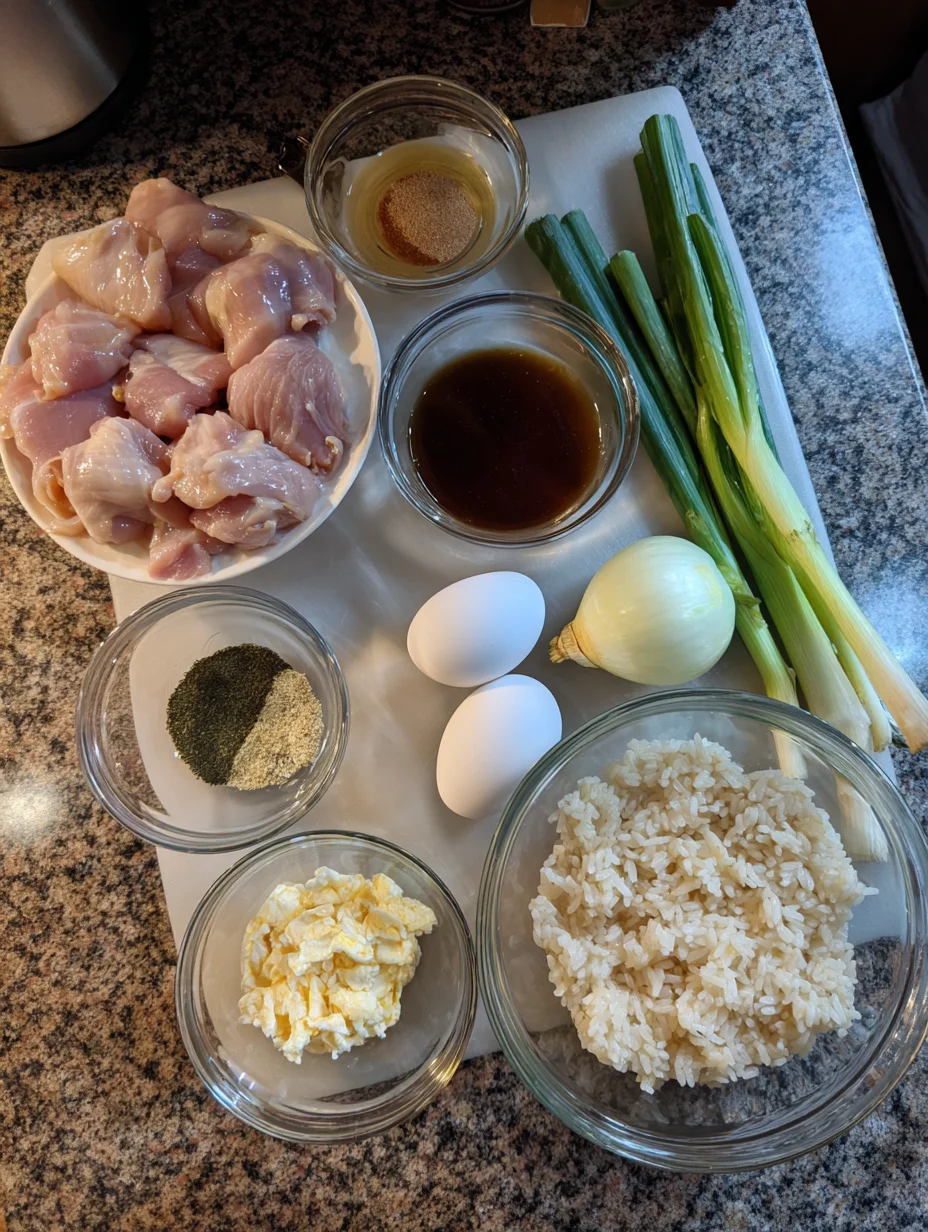
Essential Ingredients for Oyakodon
Chicken Thighs: Boneless, skinless chicken thighs are the star protein in Oyakodon, offering juicy tenderness that soaks up the flavorful broth. I prefer thighs over breasts because they stay moist during cooking and add richness to the dish. Slice them thinly for even cooking, and you’ll see how they elevate your Oyakodon to restaurant quality. In total, about 1 pound works perfectly for four servings.
Eggs: Fresh eggs are crucial for that silky, custardy topping in Oyakodon—beat them lightly to get the right texture. They bind everything together, creating a luscious finish that’s half the appeal of this dish. Use 4-6 eggs depending on how eggy you like your Oyakodon, and don’t overcook them for the best results.
Onions: Thinly sliced onions provide a subtle sweetness and crunch that balances the savory elements in Oyakodon. They soften beautifully in the broth, releasing their natural sugars. For an authentic touch, sweet onions like Vidalia work wonders in your homemade Oyakodon.
How to Make Oyakodon
Prepare the Broth and Proteins
Start by whisking together dashi, soy sauce, mirin, and sugar in a bowl—this forms the soul of your Oyakodon. Slice the chicken thighs into bite-sized pieces and thinly cut the onions, setting them aside. In a skillet over medium heat, bring the broth to a simmer, then add the chicken and onions. Let them cook for about 5-7 minutes until the chicken is nearly done, stirring occasionally to infuse those flavors deeply into your Oyakodon.
Cook the Eggs to Perfection
Now, pour the lightly beaten eggs over the simmering chicken and onions in a circular motion for even distribution—watch how they start to set gently. Cover the pan and cook for just 1-2 minutes until the eggs are soft and custardy, not overdone. The steam creates that fluffy texture I love in Oyakodon; timing is key here to avoid rubbery eggs. Remove from heat and let it rest briefly for the flavors to meld.
Assemble and Serve Your Oyakodon
Scoop hot steamed rice into bowls, then ladle the chicken, onion, and egg mixture generously over the top—this is where your Oyakodon truly shines. Garnish with sliced green onions or shichimi togarashi for a pop of color and heat. In my experience, serving it immediately keeps the rice absorbing that delicious broth. For a twist, check out this Thai satay chicken recipe if you want to explore more Asian-inspired chicken dishes.
Ingredients
- 1 lb boneless, skinless chicken thighs, sliced
- 2 medium onions, thinly sliced
- 4-6 large eggs, lightly beaten
- 1 cup dashi broth
- 1/4 cup soy sauce
- 1/4 cup mirin
- 2 tbsp sugar
- 4 cups cooked Japanese short-grain rice
- 2 green onions, sliced (for garnish)
- Optional: Shichimi togarashi for spice
Oyakodon Instructions
- In a small bowl, combine dashi, soy sauce, mirin, and sugar; stir until sugar dissolves.
- Heat a large skillet over medium heat, add the broth mixture, and bring to a simmer.
- Add sliced chicken and onions to the skillet; cook for 5-7 minutes until chicken is cooked through.
- Pour beaten eggs over the mixture in a zigzag pattern; cover and cook for 1-2 minutes until eggs set.
- Divide rice into bowls, top with the chicken-egg mixture, and garnish with green onions.
- Serve hot and enjoy your Oyakodon immediately.
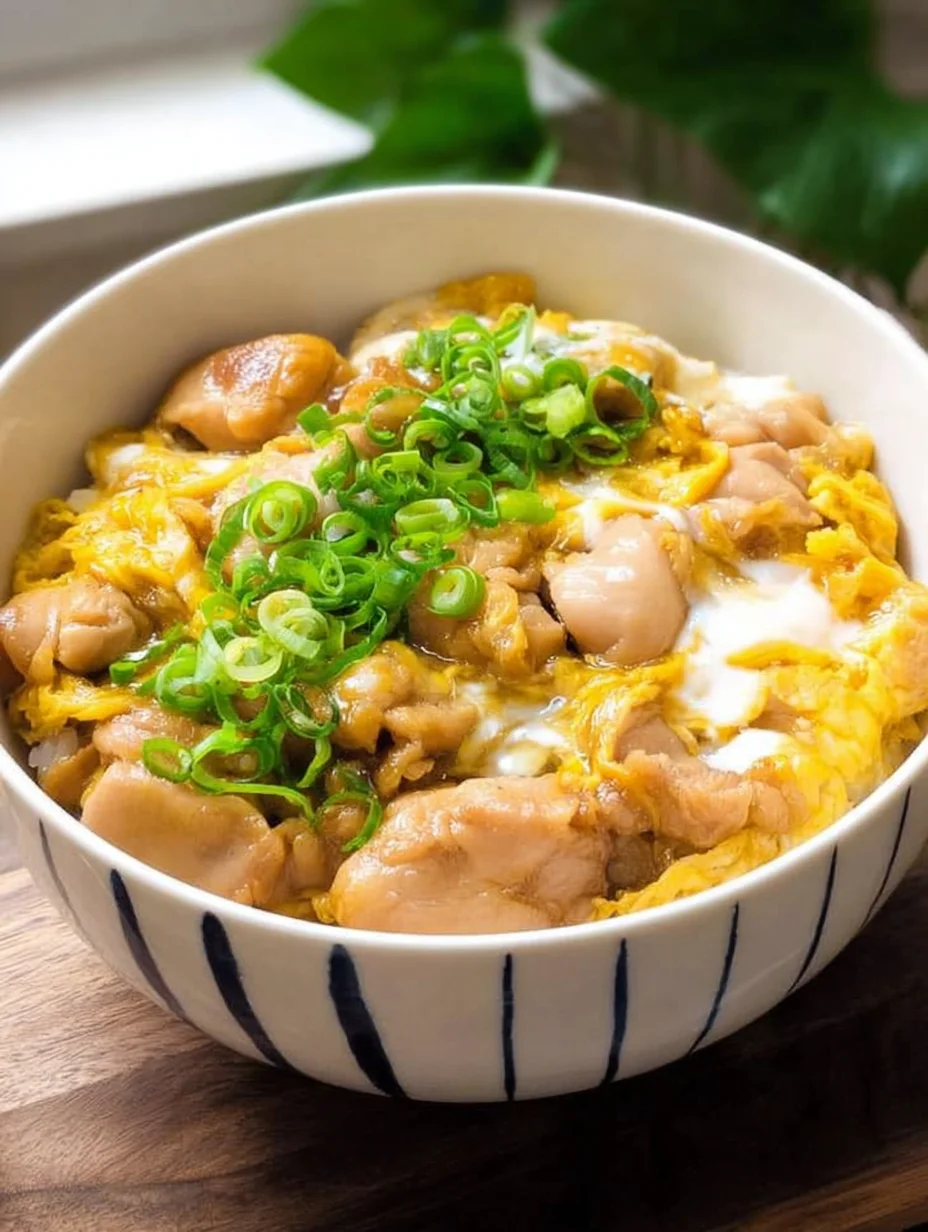
Pro Tips for the Best Oyakodon
Fresh Dashi Matters: Use homemade or high-quality instant dashi for authentic umami in your Oyakodon— it makes a world of difference in flavor depth.
Don’t Overbeat Eggs: Lightly whisk the eggs just until yolks and whites combine to keep that tender texture in Oyakodon.
Slice Uniformly: Cut chicken and onions evenly so everything cooks at the same rate in your Oyakodon skillet.
Grab This Kitchen Scale Now — Best Precision Pick!
- Razor-Accurate Every Time: Dual-increment precision down to 0.1g — perfect for baking, meal prep, and portion control with g, oz, ml, and fl'oz modes.
- Smart Removable Bowl Design: Detachable bowl doubles as a protective case for compact storage. Tare function lets you weigh ingredients in any container with zero fuss.
- Built for Everyday Convenience: Auto-zero, tare function, low battery alert, overload indicator, and 2-minute auto-off to extend battery life — all in a sleek stainless steel build.
- ✓ "Perfect for baking — precise, lightweight, and stores easily without wasting counter space"
- ✓ "A game changer! Weighing ingredients is now way more accurate than measuring cups"
- ✓ "Love the 0.1g precision and backlight — best food scale I've owned. Highly recommend!"
⏰ Only a few items left in stock - order soon
You Must Know
- Oyakodon translates to “parent and child,” referring to the chicken and egg combo.
- Traditional Oyakodon uses a donburi bowl for serving over rice.
- The dish originated in Japan in the late 1800s and remains a comfort food staple.
- Adjust sweetness by varying mirin and sugar to suit your taste in Oyakodon.
How to Store Oyakodon
To keep your Oyakodon fresh, store leftovers in an airtight container in the fridge for up to 2 days—avoid longer to prevent the eggs from getting too firm. Reheat gently in a skillet over low heat with a splash of dashi to revive the moisture, or microwave in short bursts. Freezing isn’t ideal as it can alter the textures, but if you must, do so without rice and thaw overnight.
Customizing Your Oyakodon
Feel free to swap chicken for beef or tofu in your Oyakodon for a vegetarian twist— the broth works wonders with any protein. Add mushrooms or spinach for extra veggies, keeping the cooking time similar. If you love heat, stir in chili flakes. For more chicken inspiration, try this air fryer chicken skewers recipe as a side variation.
What to Serve with Oyakodon
Pair your Oyakodon with a simple miso soup and pickled vegetables for an authentic Japanese meal— the acidity cuts through the richness perfectly. A crisp green salad with sesame dressing adds freshness without overpowering. For drinks, green tea or a light sake complements the flavors beautifully. If you’re feeding a crowd, steamed edamame makes a fun, easy side.
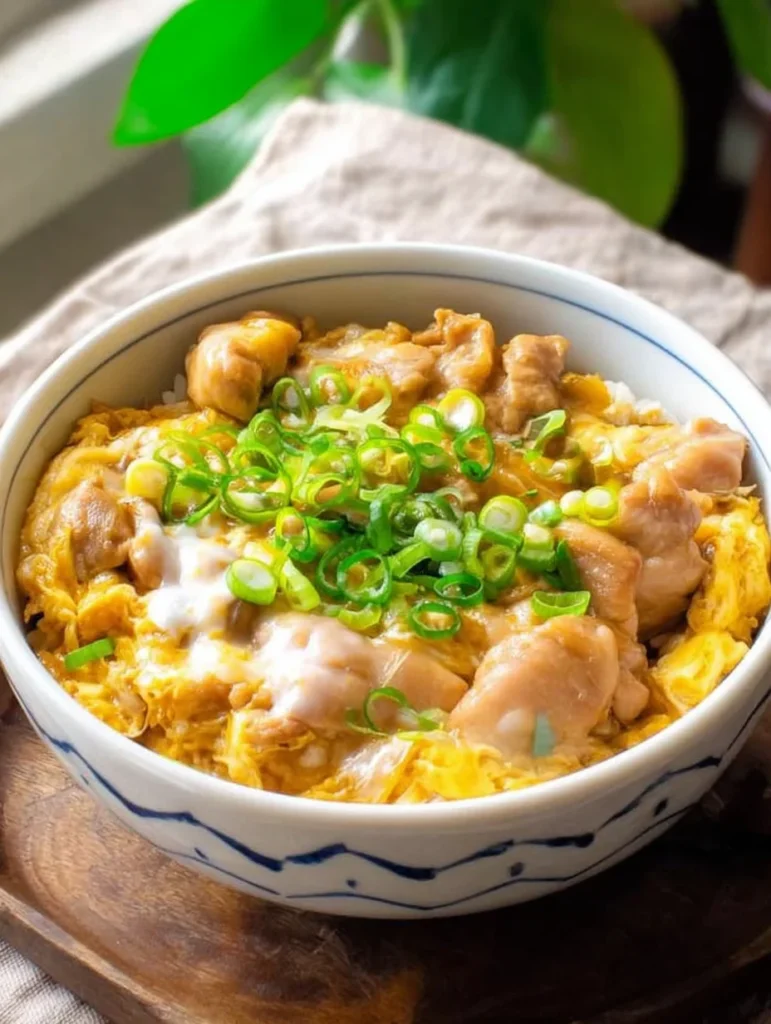
15-Minute Oyakodon (Japanese Chicken & Egg Rice Bowl)
This quick & easy Oyakodon features tender pieces of chicken simmered in a sweet and savory broth and wrapped in a soft egg scramble to be served over a warm bed of rice. This simple & delicious donburi comes together in a single pan in just a few minutes, making it the ideal comfort meal for the weekdays.
Timing
Recipe Details
Ingredients
- 01 150 g skinless boneless chicken thighs ((cut into small pieces))
- 02 1/2 medium onion ((sliced))
- 03 1/2 cup chicken stock ((or dashi))
- 04 1 tbsp soy sauce ((or more to taste))
- 05 1 tbsp mirin
- 06 1 tsp sugar
- 07 2 large eggs
- 08 1 1/2 cup cooked rice ((to serve))
- 09 green onion, sesame oil, nori and/or togarashi ((optional, for garnish))
Instructions
Combine chicken, soy sauce, mirin, and sugar in a bowl and set aside for 5-10 minutes while preparing the other ingredients.
To prepare the egg mixture, crack the eggs into a bowl and gently break the yolks using a pair of chopsticks. You want to make sure the eggs are lightly beaten with the egg whites still visible.
In a small pan, bring chicken stock to a boil over medium heat. Add onion and cook until aromatic, about 1 minute. Add the chicken mixture and cook for about 1-2 minutes on each side.
When the chicken is almost cooked through, pour the egg mixture evenly into the pan and cook for a few seconds until the edges are nearly set.
Lightly scramble the eggs and cook for a few seconds more until the eggs are still a bit runny - the residual heat will continue to cook the eggs. Serve over a bowl of rice, garnish and enjoy!
FILED UNDER:
NUTRITION FACTS (PER SERVING)
Nutrition information is calculated using an ingredient database and should be considered an estimate. In cases where multiple ingredient alternatives are given, the first listed is calculated for nutrition. Garnishes and optional ingredients are not included.
Frequently Asked Questions About Oyakodon
Can I make Oyakodon ahead of time?
Yes, you can prepare the broth and chop ingredients ahead, but cook the eggs fresh for the best texture in Oyakodon. Assembling everything just before serving keeps it warm and delicious. It’s not ideal for full make-ahead due to the eggs, but partial prep saves time.
How long does Oyakodon last in the fridge?
Oyakodon stays good in the fridge for 1-2 days when stored properly in an airtight container. Beyond that, the eggs may toughen up. Always reheat to at least 165°F for safety.
Is Oyakodon gluten-free?
Traditional Oyakodon isn’t always gluten-free due to soy sauce, but you can easily swap for tamari. Check your dashi too, as some contain wheat. With those tweaks, enjoy a gluten-free version without losing flavor.
What’s the best rice for Oyakodon?
Japanese short-grain rice is ideal for Oyakodon as it holds up well to the toppings and absorbs broth beautifully. Cook it slightly sticky for authenticity. If unavailable, sushi rice works as a close substitute.
Can I use chicken breast instead of thighs in Oyakodon?
Absolutely, chicken breast works in place of thighs for a leaner Oyakodon, but slice thinly and don’t overcook to keep it juicy. Thighs are more forgiving, though—my preference for tenderness.
How spicy can I make Oyakodon?
Oyakodon is traditionally mild, but add wasabi, chili oil, or fresh jalapeños to amp up the heat in your version. Start small and taste as you go for the perfect kick without overwhelming the savory notes.
Is Oyakodon healthy?
Yes, Oyakodon can be a balanced meal with lean protein, eggs for nutrients, and veggies like onions. It’s lower in calories than many comfort foods—around 500 per serving. Opt for less sugar to make it even healthier.
Where did Oyakodon originate?
Oyakodon hails from Tokyo, Japan, dating back to the Meiji era. It’s a beloved home-cooked dish symbolizing family. For more global twists, explore this creamy Cajun chicken pasta for contrast.
Final Thoughts
From that first comforting bite to the last, this Oyakodon recipe has won me over time and again—it’s simple, satisfying, and full of heart. I hope you’ll give it a try and make it your own family favorite. Whip it up tonight and let me know how your Oyakodon turns out; happy cooking!